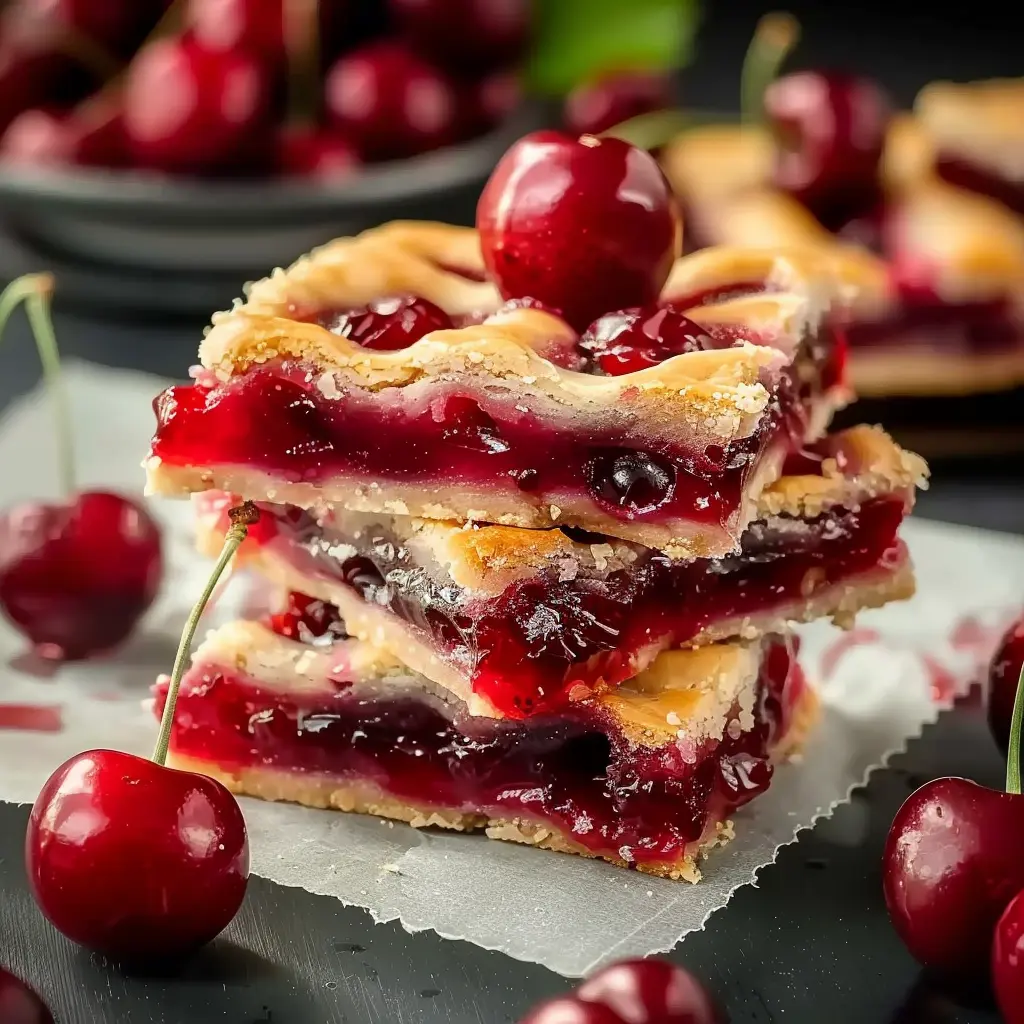
If you’re craving something sweet, simple, and irresistibly fruity, you’ll love these Easy Cherry Pie Bars. This article is your go-to guide for making a crowd-pleasing dessert that’s bursting with bright cherry flavor and made with pantry staples. We’ll cover every part of the recipe—from the buttery crust to the glossy glaze—plus tips for perfect results and answers to all your cherry pie FAQs. Whether you’re new to baking or just need a quick treat, you’re about to discover why these bars are the ultimate cherry dessert.

Table of Contents
Why I Love These Easy Cherry Pie Bars
A kitchen memory worth baking into tradition
There’s something about cherry desserts that instantly transports me to summer cookouts and holiday gatherings. One of my favorite memories is baking these Easy Cherry Pie Bars with my daughter on a rainy Saturday afternoon. As the sweet scent of almond and cherry filled the house, we danced around the kitchen in flour-dusted aprons. These bars became an instant favorite—not just for the taste, but for the joy they bring every time we bake them together.
Cherry pie has always held a special place in my heart, but making a full pie felt like too much on busy days. That’s where this simple version comes in. With the same golden crust and fruity filling, these bars give you all the classic cherry pie flavors without the fuss. The best part? You don’t even need to roll out dough.
I’ve shared this recipe during potlucks and school events, and it never fails to disappear fast. Whether you’re prepping a tray for a picnic or just need a sweet bite after dinner, these Easy Cherry Pie Bars are the perfect pick. Plus, with only 15 minutes of prep and minimal cleanup, they’re one of the easiest desserts in my collection.
The simple charm of easy baking
What makes these Easy Cherry Pie Bars truly special is how approachable they are. The dough comes together in one bowl—no mixers, no chilling, and definitely no pie weights. A can of high-quality cherry pie filling does most of the work, while the almond glaze adds just the right amount of sophistication.
And if you’re wondering how to elevate canned filling, don’t worry—I’ll show you how to doctor it up later in the article for a more homemade taste. These bars are ideal for beginners, but they’re so delicious, even seasoned bakers return to them.

Easy Cherry Pie Bars: A Classic Dessert Made Simple and Delicious
Ingredients
- 1 cup softened butter
- 1 cup sugar
- 2 large eggs room temp
- 1 tsp almond extract
- 1 tsp vanilla extract
- 2 ½ cups all-purpose flour
- ½ tsp salt
- 1 21 oz can premium cherry pie filling
For glaze:
- 1 cup confectioners’ sugar
- 1 tsp almond extract
- ½ tsp vanilla extract
- Milk as needed
Instructions
- Preheat oven to 350°F (175°C).
- Cream butter and sugar until light and fluffy.
- Add eggs, almond extract, and vanilla extract. Mix well.
- Stir in flour and salt to form soft dough.
- Press half the dough into a greased 9×13-inch pan.
- Spread cherry pie filling evenly over the base.
- Dollop remaining dough across the top of the filling.
- Bake for 35–40 minutes, until golden brown.
- Cool completely in pan.
- Mix glaze ingredients to desired consistency.
- Drizzle glaze over cooled bars, slice, and serve.
Notes
Nutrition
How I Bake These Easy Cherry Pie Bars—Step by Step
Simple steps for a stress-free, crowd-pleasing treat
Whenever I make these Easy Cherry Pie Bars, I’m reminded that the best desserts don’t have to be complicated. They just need to be made with care—and maybe a little almond extract. This recipe is one I return to again and again, especially when I need something sweet and beautiful without turning the kitchen upside down.
Here’s exactly how I do it:
First, I preheat the oven to 350°F (175°C). Then, I grab a big bowl and cream together a cup of softened butter with a cup of sugar. This is one of my daughter’s favorite parts—watching the butter and sugar become light and fluffy. Once that’s done, I whisk in two large eggs and stir in a teaspoon each of almond and vanilla extract. That fragrant mix always tells me something delicious is on the way.
Then I add the dry ingredients: 2½ cups of flour and a pinch of salt. The dough comes together quickly and feels soft and buttery in your hands. I press half of it into a greased 9×13-inch baking pan to form the bottom layer.
Now for the magic—cherry pie filling. I spoon it right over the crust, spreading it gently to the edges. I use one 21-ounce can of high-quality cherry pie filling, but if I want to take it up a notch, I’ll stir in a little fresh lemon juice and a dash of cinnamon. It makes the cherries sing.
Finally, I dollop the rest of the dough across the top. Don’t worry about perfection here. The uneven patches give it a rustic, homemade look. I pop it in the oven and bake for about 35 to 40 minutes—until the top is golden and the cherry filling bubbles happily at the edges.
Once they’re cooled, I drizzle a simple glaze made with powdered sugar, almond and vanilla extracts, and just a touch of milk. That final touch ties it all together, giving each bite a sweet little sparkle.
They slice beautifully, store well, and always make people smile.
Tips I’ve learned along the way
Over time, I’ve picked up a few little tricks that make these Easy Cherry Pie Bars even easier. Lining the pan with parchment paper? Game changer. It makes cleanup a breeze and lifting the bars out of the pan super simple.
If I’m short on time (or energy), I’ll prep the dough a day ahead and keep it in the fridge. Letting it warm up just a bit before baking helps it spread nicely. And when I want to impress guests without spending extra time, I sprinkle slivered almonds or lemon zest over the glaze for a bakery-style finish.
These bars also freeze beautifully. I often stash a few away for unexpected visitors—or for me, after a long day.
Ways to Make Easy Cherry Pie Bars Your Own
Little twists that make a big difference
One of my favorite things about these Easy Cherry Pie Bars is how flexible they are. You can stick with the classic version (which is already pretty perfect), or play around with small changes to match the season, your mood, or whatever you’ve got in the pantry.
Sometimes I swap the cherry pie filling for blueberry or raspberry when I want something a little different. And if I have a ripe peach or two on hand, I’ll chop them up and stir them into the filling for a sweet summer twist. The dough is sturdy enough to hold any fruit combo you like.
Want a richer flavor? Try browning the butter before mixing the dough. It adds a toasty, nutty depth that pairs beautifully with cherries. Or stir in some lemon zest to brighten things up. If you’re baking during the holidays, a pinch of cinnamon and nutmeg in the crust brings out those warm, cozy flavors.
These bars also go great with a drizzle of white chocolate, a sprinkle of chopped almonds, or even a dollop of whipped cream. And yes—if you’re a chocolate lover, adding dark chocolate chips to the top layer is always a good idea.
Going gluten-free? Use a 1-to-1 gluten-free baking mix (with xanthan gum if needed). Dairy-free? Just swap in your favorite plant-based butter and non-dairy milk for the glaze.
Storing and serving Easy Cherry Pie Bars
These Easy Cherry Pie Bars are just as handy as they are tasty. Once they’ve cooled and been glazed, I store them in an airtight container at room temperature for up to two days. If I need them to last a bit longer (say, for a weekend brunch), I pop them in the fridge where they stay fresh for about a week.
Before serving, I like to bring them back to room temp so the glaze softens and the flavor really shines through. If I’m freezing them, I wrap individual bars in parchment paper and stash them in a freezer bag. They’ll keep for up to three months—and thaw beautifully on the counter.
Honestly, they’re so easy to share and so quick to disappear, I’ve learned to make a double batch. You’ll thank yourself later.
Conclusion: A Cherry-Sweet Tradition Made Simple
These Easy Cherry Pie Bars are more than just a dessert—they’re a little slice of happiness baked into every batch. Whether you’re a seasoned baker or just starting your kitchen journey, this recipe is one you’ll turn to again and again. It’s simple, satisfying, and full of that classic cherry pie flavor without any of the hassle.
From the buttery crust to the bright cherry filling and almond-scented glaze, every bite feels like a celebration. And the best part? They bring people together. Whether you’re making them for a bake sale, a cozy weekend treat, or just because—it’s always the right time for Easy Cherry Pie Bars.
With warmth and a sprinkle of sugar,
Lina
FAQs : Easy Cherry Pie Bars Questions—Answered
Should you prebake the bottom crust of a cherry pie?
For traditional pies, prebaking the bottom crust can help prevent sogginess—but with these Easy Cherry Pie Bars, you can skip that step. The buttery dough bakes up beautifully all at once, creating a soft, golden crust that holds its shape without any fuss. I’ve never prebaked it, and the bars always turn out just right. However, if you’re using extra juicy homemade filling, a quick 8-minute prebake won’t hurt.
How to doctor up canned cherry pie filling?
I use canned cherry pie filling all the time, but I almost always give it a little love before spreading it on the dough. A splash of lemon juice adds brightness, while a pinch of cinnamon or almond extract brings depth and warmth. If I have them, I’ll fold in a handful of fresh or frozen cherries to boost texture and flavor. These little tricks make your Easy Cherry Pie Bars taste like they came straight from a bakery.
Do cherry pie bars need to be refrigerated?
These bars don’t need refrigeration if you plan to eat them within a day or two. I often leave them covered on the counter when we’re hosting friends or baking the night before a picnic. But if you’re making them ahead or storing leftovers, pop them in the fridge—they’ll stay fresh for up to a week. I just let them sit out for 10–15 minutes before serving to bring out the full flavor and texture.
How to pit cherries for pie filling?
If you’re making your own filling from scratch (and I totally support that!), pitting cherries is the only real labor—but it’s a satisfying one. I use a cherry pitter when I want speed, but if I’m in no rush, a sturdy straw or chopstick works too. Just push from the stem end until the pit pops out. It’s a little messy, sure—but also kind of fun, especially with kids helping.
