Introduction
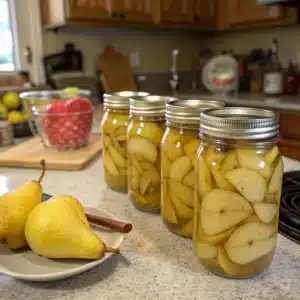
Canning pears is a fantastic way to preserve the sweet, juicy flavor of this fall fruit for enjoyment throughout the year. Whether you’re looking to make pear preserves, pear sauce, or simply canning whole pears in syrup, this process will allow you to enjoy the taste of fresh pears well beyond the harvest season.
Lina Vexley offers a step-by-step guide to canning pears, so you can easily preserve their sweetness for later use in baking, cooking, or simply enjoying straight from the jar.
Canning Pears Recipe

Canned Pears
Equipment
- Canning Jars
- Large Pot
- Canning Lid and Bands
- Jar Lifter
Ingredients
- 10-12 medium-sized Pears
- 4 cups Water
- 2 cups Sugar
- 1/4 cup Lemon juice
Instructions
- Start by preparing your pears. Peel, core, and slice the pears into halves or quarters, removing the seeds.
- In a large pot, combine 4 cups of water, 2 cups of sugar, and 1/4 cup of lemon juice. Bring the mixture to a boil and stir until the sugar dissolves to create the syrup.
- Once the syrup is prepared, gently add the pear halves or quarters to the pot. Simmer the pears in the syrup for 5-10 minutes until they soften slightly.
- While the pears are simmering, sterilize your canning jars by placing them in a boiling water bath for 10 minutes.
- Using tongs or a jar lifter, remove the jars from the water and ladle the hot pears into the sterilized jars, leaving about 1/2 inch of headspace at the top.
- Pour the hot syrup over the pears in the jars, making sure the pears are completely submerged.
- Wipe the rims of the jars clean, then place the canning lids and bands on each jar, tightening them just enough (don’t overtighten).
- Process the jars in a boiling water bath for 20-25 minutes to seal them. Make sure the jars are fully submerged in water during the process.
- After processing, remove the jars and let them cool. You should hear a popping sound as they seal. Once cooled, store the jars in a cool, dark place. Canned pears can be stored for up to a year.
Notes
Nutrition
How to Can Pears
Canning pears is a simple and satisfying process that allows you to preserve the sweet and juicy flavors of this fall fruit. Here’s how to do it:
Step 1: Prepare the Pears
Start by peeling, coring, and slicing the pears into halves or quarters. Removing the seeds is essential, as they can make the pears gritty. Set the pears aside.
Step 2: Make the Syrup
In a large pot, combine 4 cups of water, 2 cups of sugar, and 1/4 cup of lemon juice. Bring the mixture to a boil, stirring until the sugar dissolves completely. This syrup will help preserve the pears and give them a delicious sweetness.
Step 3: Simmer the Pears
Once the syrup is prepared, gently add the pear halves or quarters to the pot. Simmer them in the syrup for about 5-10 minutes, just until they soften slightly. You don’t want them too soft at this stage.
Step 4: Sterilize the Jars
While the pears are simmering, sterilize your canning jars. Place them in a large pot of boiling water for 10 minutes to ensure they are free from bacteria.
Step 5: Pack the Jars
Using tongs or a jar lifter, carefully remove the sterilized jars from the boiling water. Ladle the hot pears into the jars, leaving about 1/2 inch of space at the top. Pour the hot syrup over the pears, making sure the pears are fully submerged.
Step 6: Seal the Jars
Wipe the rims of the jars clean with a damp cloth. Place the canning lids and screw on the bands, tightening them just enough to hold them in place. Do not overtighten.
Step 7: Process the Jars
Place the filled jars in a boiling water bath and process them for 20-25 minutes. The water should cover the jars completely during this process to ensure they seal properly.
Step 8: Cool and Store
Once the jars have processed, remove them carefully from the water and let them cool. You should hear the sound of the jars sealing as they cool. Once cooled, store the jars in a cool, dark place, and they’ll be good for up to a year.
Conclusion
Lina Vexley’s canned pears are a fantastic way to preserve the flavors of the season and enjoy the taste of fresh pears all year round. Whether used in desserts, on top of oatmeal, or in savory dishes, canned pears are incredibly versatile and make a wonderful addition to your pantry. Canning them is easy and ensures that you can enjoy this delicious fruit long after the harvest season is over.
